
While some cars have seriously decent OEM seats (Nick's GT3, for example), the Boxster was equipped with flat, tired, worn-out, pieces of... junk. They were a mess. Replacing the seats would be the next project.
Racing seats are purchased in much the same manner as you get shoes. You go to a race shop and you sit your derriere in seats of various widths. Once you butt is snug, your back is comfortable, and your wallet can stomach it... you buy a seat. Wait, you buy two seats. Unlike shoes, seats are not sold in pairs. Ouch.
We knew we wanted 6-point harnesses, so our seats had to have all of the proper holes in them - no big deal. We found two very nice "Momo" fiberglass seats that were on close-out for about $400 each. Sold! Most seats don't bolt directly into the "rails" (the metal sliders on the floor). You need to buy those too (add about $100 per side). This is painful.
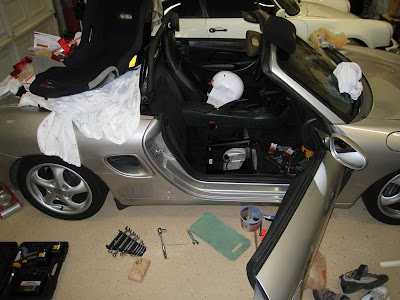
Sitting in my garage, I decided to pull the passenger side seat first. I didn't know how long it would take (and I knew I needed hardware), so I would do all my "learning" on that one. With socket wrench in hand, and a special star-type socket set (thank you Sears) I made quick work of the OEM bolts. The seat was loose, but it was held in by the wires from the power cords (power seats), and the seat belts. I cut the wires with wire cutters, and unbolted the seat belt from the "B pillar" (the pillar behind the driver and passenger). The seat was heavy, so I dragged it out of my car onto the floor of the garage. My painter just happened to be there painting doors inside my house, so I gave him the seat (so, if you ever see a mid-80's Toyota pick-up with a Porsche Boxster seat...).
Remembering the female recepticle of the seat belt was bolted to the OEM seat, I ran out to the painter's truck and removed it. Whew, that was close. Belt receptible in hand, I re-mounted the "street" belts to work with the new seat (remembering to thread them through the lap harness hole). It was done!

- Mike
No comments:
Post a Comment